Exploring Plant Sun Prints
How to create prints of your nature treasures and mini pressed flowers using the power of the sun with the Turmeric Sun Print Kit
10/8/20243 min read
Turmeric Sun Print Kit | Mini Anthotype Project
Using turmeric sun print paper and pressed flowers or leaves, you can create tiny, one-of-a-kind anthotype prints using your nature treasures and the power of the sun.

What’s an Anthotype?
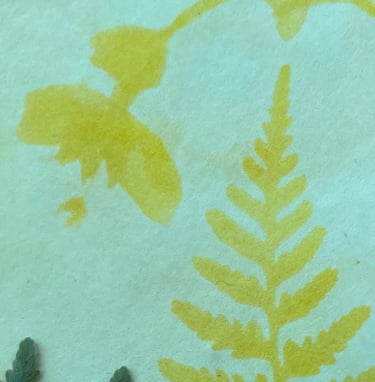
An anthotype is a type of sun print made with plant material. The process involves coating paper with crushed or juiced plants that are light sensitive and placing an object (like a leaf or flower) on the surface. When exposed to sunlight, the parts of the paper exposed to light naturally fade, leaving behind an imprint of the object. Turmeric is a favorite for anthotype projects for how quickly the vibrant color fades and how you can shift the color with a solution of water and baking soda (or borax) to create high contrast images.
What’s in the Turmeric Sun Print Kit?
Everything you need for this solar powered nature art project. It's small enough to use on your outdoor adventures and fits in a pocket! Here’s what you’ll find inside:
Turmeric Anthotype Paper (3 sheets)
A Mini Frame with a rubber band to hold your print and secure the material inside
An instructional zine with all these steps, a recipe for making your own anthotype emulsions, and a list of resources for future sun print projects.
How to Use the Kit
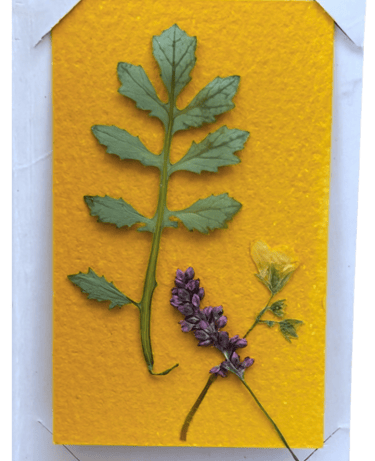
Collect Your Nature Treasures: For the best results, use dried or pressed plant material that won’t shift or shrink during exposure. When harvesting, remember to be mindful—choose plants you know, those that are abundant or available due to windfall, and always have permission from both the plant and the people in the space.
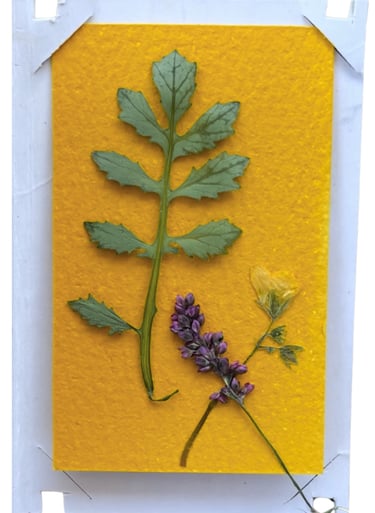
Framing Your Botanicals: Remove the rubber band from the anothype frame. Place and arrange the dried plant material on top of the turmeric sun print paper inside and then place the window frame piece on top sandwiching the plant material on the sun paper inside. Secure with the band around the outside of the frame.
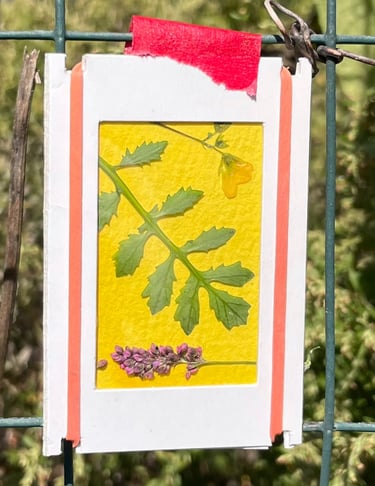
Expose to Sunlight: Find a sunny spot for your project. Full sun is best, but even on a partly cloudy day, your anthotype will develop with exposure to direct light over time. You’ll know it’s ready when the paper becomes noticeably lighter—this can take anywhere from an hour to several hours, depending on your weather conditions. TIP: Check the UV index in the weather forecast to determine good sunny days for best exposure.
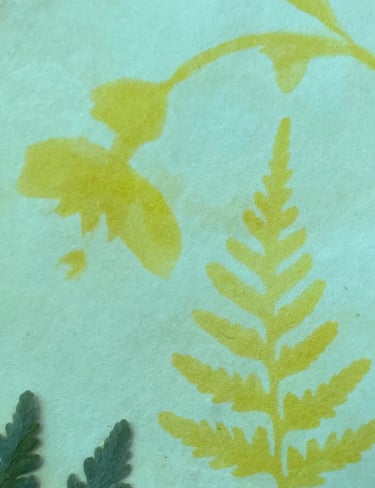
Reveal Your Print: Remove the frame and lift off your plant material to see the magic! TAH DAH! You now have a unique sun print that captures the essence of the plant. Use it as a bookmark, journal decoration, or frame it as a tiny piece of art out of direct sun behind UV protective glass (or display in the light to remind yourself of the ephemeral and watch the image fade--naturally--over time).
Additional Anthotype Resources:
Indigo in Green
Got questions? Exciting results? Thoughts on the prototype anthotype kit? Email Nicole at hello@indigoingreen.com
Anthotypes: Printing with Light and Plant Dyes
Dr. Adilet Zhakeyev and Assistant Prof. Jose Marques-Hueso
Heriot-Watt University
Create your own turmeric sun print paper.
Alternative Photography
Alternativephotography.com
Experiment with making your own sun print paper with other plant emulsions. Reference and add to the database and participate in World Anthotype Day.
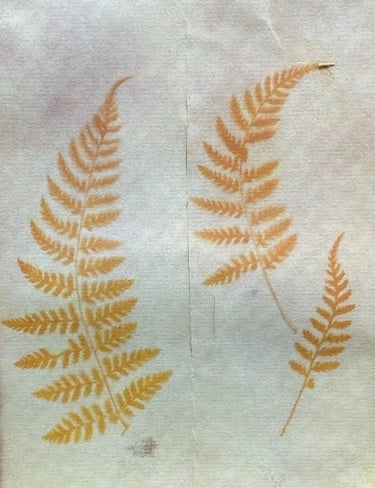


Bonus Plant Magic : Want to shift the color of your turmeric sunprint? Soak your print in a baking soda or borax solution for a sepia or brown hue. Create a color shifting bath to soak your print by adding 1 teaspoon of baking soda to 1/4 cup of water (~8.5% w/v solution of baking soda in water) in a bowl or tray. Allow to soak until you see the shift in color then remove from the solution. Rinse to remove any additional baking soda on the surface and allow to dry. The color may continue to change and shift as the print dries.